Vignettes are a very quick and easy way to add a sense of film like intimacy to your video or footage. They also allow you to subtly focus the viewers attention on a particular element in a particular shot. Adding a vignette in Premier Pro can be done very quickly with effective results.
Watch the video tutorial:
Text Tutorial:
1. One your video is on the timeline add a transparent video layer to your project:
2. Select the default settings on the transparent video layer.
3. Drag the new transparent video onto the layer above the video you want to vignette.
4. Search the default effects for the circle generator and drag it onto the transparent video layer.
5. Adjust the circle radius unto it just about fills the screen.
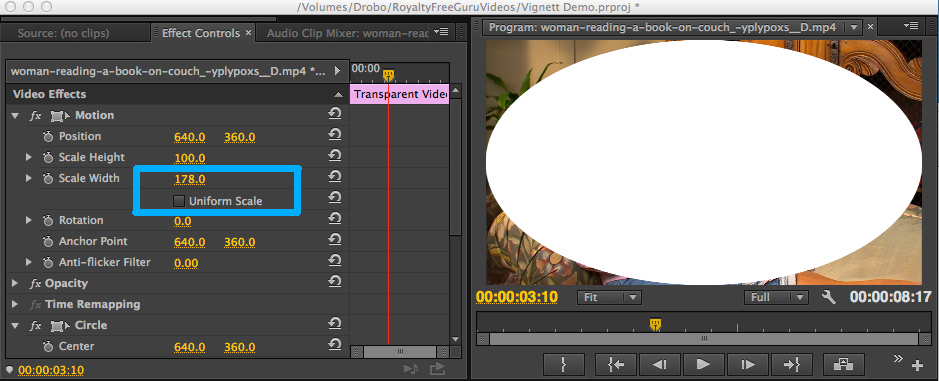
6. Under the transparent video motion drop down uncheck the “Uniform Scale” checkbox. Then adjust the width until the oval just fills the frame.
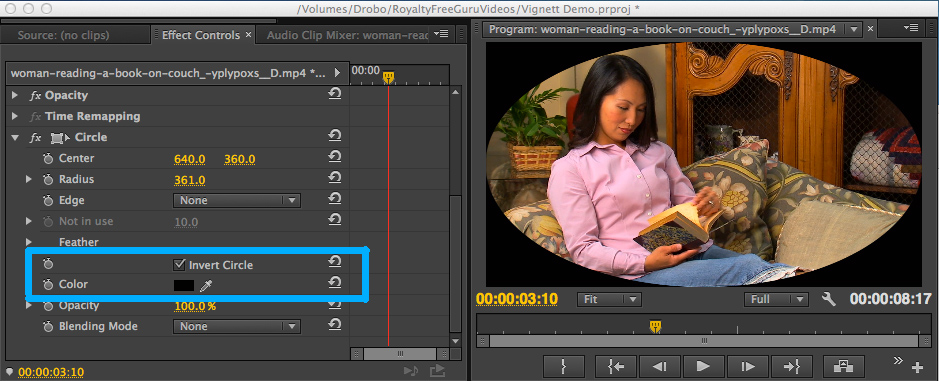
7. Change the color of the circle to black then check the “Invert Circle” checkbox to invert the circle.
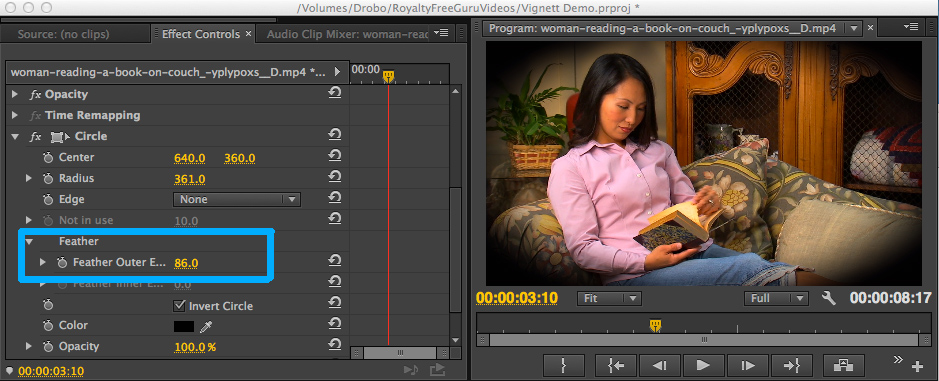
8. Feather the outer edge of the circle to give it a soft transition.
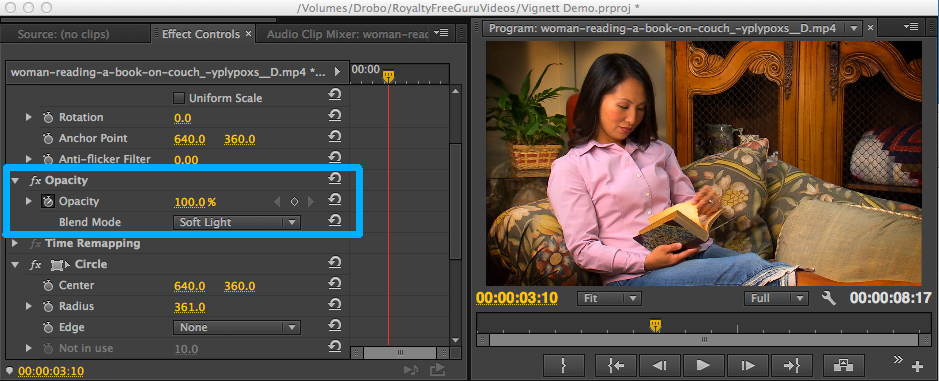
9. Under the opacity drop down change the blendmode to “Soft Light”.
Once you have the basic vignette you can play with the various overlays, opacity settings, feather settings and circle size to create the exact style you are looking for.


